

Here’s a recipe that adds fruit to dinner and takes all the guilt out of orange-flavored chicken. There’s no sugar and no fryer involved. Just skinless, boneless chicken breast, marinated in orange juice, pan seared and then baked. Serve it up with orange-spiked green beans for a nutritious, protein-packed meal.
Servings: 4

Here’s what you need:
For the Chicken:
- 2 cups fresh orange juice
- 2 Tablespoons grated orange zest
- 4 skinless, boneless, chicken breasts
- fresh ground pepper
- 1 Tablespoon olive oil
For the Green Beans:
- 10 oz fresh, organic, green beans
- 1/4 cup fresh orange juice
- 1 Tablespoon grated orange zest
- 1 teaspoon olive oil
- dash of salt and pepper
For the Orange-Brandy Sauce
- 2 Tablespoon coconut oil
- 3 shallots, minced
- 2 Tablespoons brandy
- 1 cup fresh orange juice
- 1/2 cup chicken broth
- 1 navel orange, peeled and each segment cut into 3 pieces
- 1 Tablespoon parsley, chopped
- Dash of salt and pepper
Cook the Chicken:
- Place the orange juice and orange zest in a large ziplock bag. Season each side of the chicken breasts with salt and pepper. Place the chicken breasts in the ziplock bag, coating each side with juice. Marinate in the refrigerator for 2-3 hours.
- Preheat the oven to 400 degrees F.
- Grease a 12-inch, oven-proof skillet with the olive oil. Place over medium-high heat. Add the chicken breasts in a single layer, cooking for 3 minutes. Turn the chicken, season with a sprinkle of salt and pepper. Place the skillet in the oven for 15 minutes, or until a thermometer registers 165 degrees F in the center of the thickest breast.
- Remove from oven and cover with foil as you make the sauce and cook the beans.
Cook the Green Beans:
- Wash the beans, snap off and discard the stems. Place in a large ziplock bag with the orange juice and orange zest. Allow to marinate in the refrigerator for 30 minutes.
- Heat a medium sized skillet over medium heat. Grease with the olive oil. Remove beans from refrigerator, discarding the juice. Add to the skillet and cook, covered for about 5 minutes, stirring occasionally. Remove cover, increase the heat and cook for an additional 3 minutes, until the beans are bright green.
Cooke the Sauce:
- In a medium skillet heat the coconut oil over medium-high heat. Add the minced shallot, cook, stirring often, for 2 minutes. Turn off the heat, add the brandy. Return to the heat and cook, scraping the bottom, until the brandy has almost evaporated, about 30 seconds. Increase the heat to high, add the orange juice. Boil for 5 minutes. Add the chicken broth, boil for 3 minutes.
- Add in the orange segments and the parsley. Turn off heat. Season with salt and pepper.
To Serve:
- Cut the chicken on the diagonal into thin slices and arrange over a pile of green beans. Drizzle with the orange-brandy sauce.
Nutritional Analysis: One serving equals: 302 calories, 13g fat, 161mg sodium, 19g carbohydrate, 4g fiber, and 29g protein
Posted in Healthy Eating by .
From Lisa Bullock
We received a question from Carla requesting a little more information about foam rolling for sore knees and asking how she could strengthen her legs to relieve knee pain. If you missed my email about training with knee pain, check it out HERE.
I’m going to make a generalisation here. In the absence of diagnosed injury or trauma – the majority of knee pain is actually a result of tight hips and inadequate release techniques for the quads. And here’s another big call – the majority of people with very tight quads and hip flexors also suffer lower back pain! Dealing with stiffness in the hips then becomes incredibly important for overall wellbeing! While this blog deals with basic techniques, if you want to take it further then Eric Wong is the man to show you how to deal definitively with hip mobility!
But for now let’s look at how we can improve that situation. The good news being, it’s just not that hard!
Let’s address the foam rolling and stretching part of Carla’s question first. Go slowly, because if the muscles in the front of your thighs (quads) are very tight or sore, rolling them will be a little uncomfortable at first – it may take a few reps for that initial sensitivity to ease off. The technical description is “it stings Mum!!!!!”.
You might like to start with as little as 30 seconds and then work your way up as it becomes easier. Hold yourself on your elbows in a plank position (and please don’t let your back sag!) with the foam roller positioned under your thighs just above your kneecaps and gently roll to and fro on the roller massaging up the thigh and back down again. Make sure you’re rolling the thigh and not putting any pressure on the kneecaps themselves. You can then re-position the roller underneath your hips and roll the hip flexors too. Ideally you’ll be aiming to foam roll and stretch your quads every day till that knee pain starts to ease.
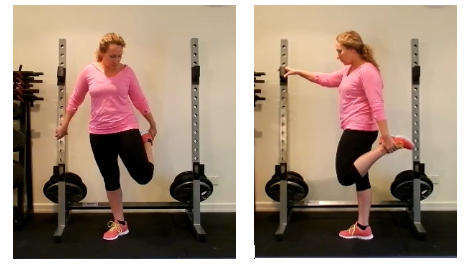
Quad stretches are done every day, somewhere in the world, in every gym, and on the whole, done very badly! Here’s what a typical quad stretch looks like – and please note this is INCORRECT and a waste of time! In this position, the hip flexors aren’t on a stretch and the quads aren’t even actually targeted.
Let’s look at what a CORRECT quad stretch should look like.
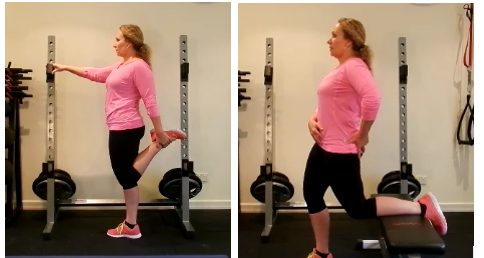
The whole posture is different for a start. Lift your chest and lengthen through your spine. Pull your ankle – NOT foot – back towards your bottom. Gently tuck the pelvis under while pulling the knee back in line with the knee on the supporting leg, you could even aim to get your knee back further with time. At the same time as you tuck the hip under, clench your glutes (bottom muscles) strongly and gently push forward through the hip.
And voila! A totally different stretch right there. And it’s completely effective. For those of you who suffer low back pain as a result of tight hips, even reaching down and grabbing that foot might cause your back to spasm so use the option of the bench as pictured.
Simple techniques that earn lots of reward. Mega-bang for buck – my favourite kind of technique.
Dealing with hip tightness and mobility is a huge issue – especially as we spend more time sitting than any other generation in the history of mankind! Eric Wong has an impressively researched and demonstrated program for dealing with hip mobility which may benefit you if you have these ongoing issues. You can check that out HERE.

Posted in Workouts by .
Guest Post
3 Best Butt Exercises of All Time
By Kate Vidulich
Yeah, you do squats. But aren’t you ready to mix it up a bit?
Of course you are. 😉 
Here’s the thing…
You don’t need to spend half an hour on the abductor/adductor machines at the gym. Or even do a million squats to get a fitter, firmer butt.
This is my secret, magic formula:
Activation – Strengthen – Fatigue
OK try this quick, 3 exercise circuit that targets your glutes and get a fitter, firmer butt just in time for Summer. You only need a pair of dumbbells – heck you could even do it with ZERO equipment.
Note: You must do these exercises in the order listed. It’s very important for the progression of the circuit.
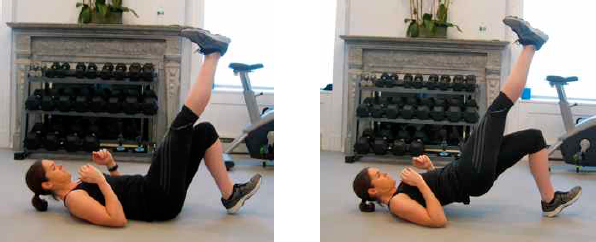
1. Single Leg Glute Bridge (aka one leg hip extension)
It’s one of my all time favorite exercises, and you will find it in most of my dynamic warm ups. Reason being, this is the best move to fire up your glutes and get them activated – seeing as we spend too much time sitting. Plus ANYONE can do this move.
The idea is raise your hips up off the floor until your knees, hips and shoulders form a straight line. If you’re having trouble getting range of motion, try the glute bridge with both feet on the ground instead.
Do 15-20 reps on each leg.
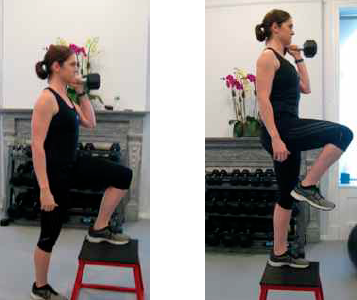
2. Dumbbell Offset Step Up
This is a simple exercise – but one of the best for getting a sexy backside.
You may have seen plenty of variations, so here’s how to do it:
Grab a dumbbell and hold them at arm’s length at your sides. Stand in front of a bench or step and place your left foot firmly on the step, high enough that your knee is bent 90 degrees.
(A) Drive the weight through your left heel and focus on squeezing your butt. Push your body up until your left leg is straight and you’re standing on one leg on the bench, keeping your right foot elevated.
(B) Lower down until your right foot touches the floor. Do 8-12 reps on each leg.
Note: You shouldn’t feel pain in your knees.
As a sexy bonus, this move will help you climb stairs like a ninja 😉
3. Single leg walkout to curtsy squat
You won’t find this exercise in any textbook or magazine – because I made it up! It’s a total body move that will target your butt.
Here’s how to rock it:
First, do a reverse lunge, followed by a single leg walkout, one cross body mountain climber, a push up and then finish with a curtsy squat.
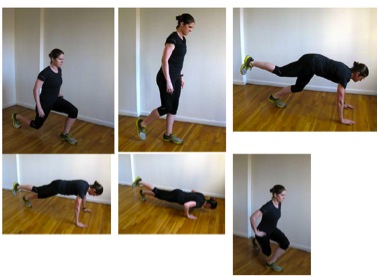
Yep, that’s one insane rep. Just aim for 5-8 reps each leg to start with and take your time. The quality of the movement is far more important than trying to rush.
Try to keep your non-working leg off the ground for the entire set.
Here’s a quick summary of the sexy circuit:
(A) Single leg glute bridge x 15-20 reps
(B) DB Offset Step Ups x 8-12 reps
(C) Single leg walkout to curtsy squat x 5-8 reps
No rest between the exercises, break for 30s at the end of the circuit and repeat for 3 rounds.
BONUS Workout:
You can do this instead of cardio at the end of your workout. Ready?
Ladder Accelerator 5: One legged Gauntlet
Do the following circuit resting only when needed. If you’re form breaks down, please take a break. Do as many rounds as possible for 6-10 minutes, depending on your fitness level.
Choose Your Level:
Beginner = 6 minutes as many rounds as possible (AMRAP), sub seal jacks for step jacks.
Intermediate = 8 minutes AMRAP
Advanced = 10 minutes AMRAP
A) Single leg walkout x 5 each side, seal jacks x 30
B) Single leg walkout x 4 each side, seal jacks x 25
C) Single leg walkout x 3 each side, seal jacks x 20
D) Single leg walkout x 2 each side, seal jacks x 15
E) Single leg walkout x 1 each side, seal jacks x 10
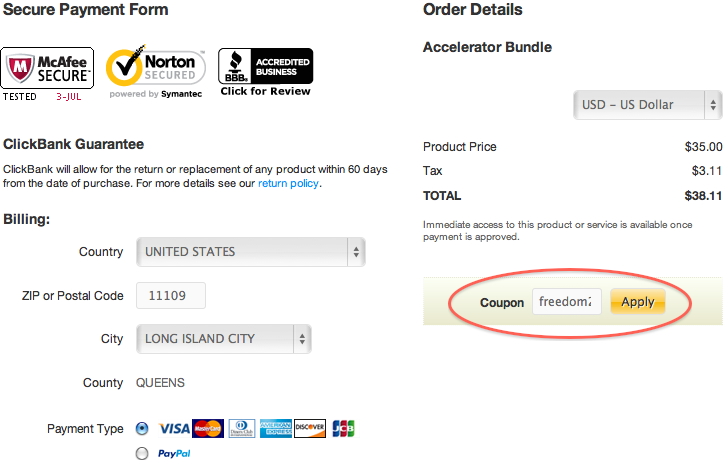
And if you love that workout, you can celebrate your “freedom” with over a hundred more body sculpting workouts here.
Get 10 FULL Fat Loss Accelerator Programs at 89% OFF! <= Biggest discount EVER
You’ll discover TONS of new exercises. 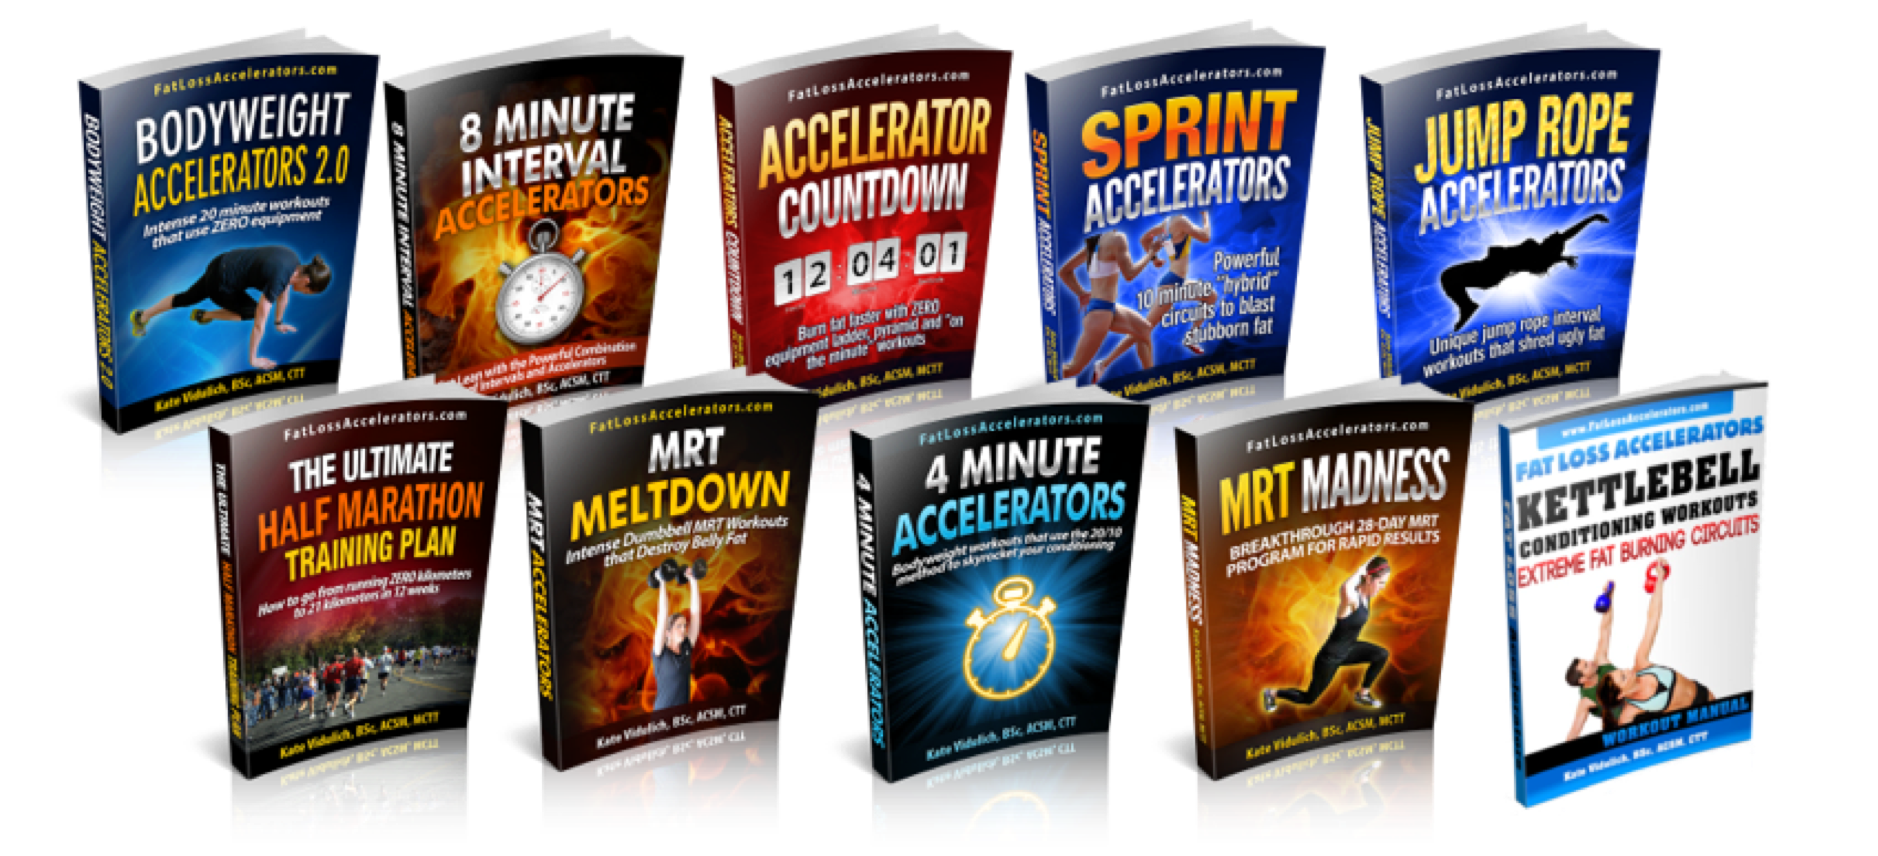
You’ll get AMAZING results.
Your body WILL change.
Yes, you’ll have to work hard.
But honestly, we all know it’s worth it… because it changes us for the better!
Let’s go!
Kate Vidulich, BSc, ACSM, Master CTT
PS. Since Kate V is a cool cat and we’re best buds, she’s provided us with a COUPON CODE so that at the check out you’ll save big time in honor of Independence Day 😉
Watch for the coupon code box on the check out and use the coupon code she made just for our readers ‘freedom20‘
Posted in Workouts by .
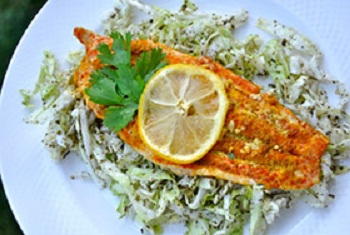
Catfish is a wonderful source of low fat protein. Lots of recipes call for frying catfish, but baking turns it into a low calorie, high protein meal. The generous seasoning of the catfish lends to a rich flavor that is complimented perfectly by the light minty salad.
Servings: 4
Here’s what you need…
For the Catfish:
- 1 teaspoon olive oil
- 1 bunch of fresh cilantro, washed and stems trimmed
- 4 catfish fillets
- curry powder
- salt
- sweet paprika
- 1 lemon, juiced
- 4 garlic cloves, finely minced
- Preheat oven to 350 degrees F.
- In a glass baking pan, drizzle the olive oil and scatter the cilantro over the bottom of the pan.
- Generously season both sides of each fillet with curry, salt and sweet paprika. Place the fillets evenly across the bottom of the pan, on top of the cilantro.
- In a small bowl, combine the lemon juice and finely minced garlic. Pour over the tops of the fillets.
- Cover the pan with foil. Bake for 30 minutes. Remove foil and bake for an additional 5 minutes.
For the Salad:
- 1 head green, organic cabbage, shredded
- 1/8 cup crushed, dry mint leaves
- 1/8 cup fresh squeezed lemon juice
- 4 garlic cloves, finely minced
- 1 teaspoon olive oil
- dash of salt
- Wash the shredded cabbage and place in a medium sized bowl. Sprinkle with the dried mint, mix well.
- In a small bowl combine the remaining ingredients. Pour over the cabbage and mix well.
Nutritional Analysis: One serving equals: 221 calories, 8g fat, 102mg sodium, 13g carbohydrate, 7g fiber, and 26g protein
Posted in Healthy Eating by .
2
Jul 14
Super Foods for a Super Body
Guest Post from James Gaida
Have you ever wondered how Super Heroes do it? How do they build those amazing bodies?
Take a look at Wonder Woman. She didn’t always look this great.
There was a time when Wonder Woman wasn’t feeling like a Super Hero. She wasn’t always comfortable in her revealing crime fighting attire.

So what changed?
Well, for starters, she came across one of Shawna K’s sample workouts on YouTube and got hooked.
Additionally, she made some dietary changes and began focusing on 15 foods that should be included in your daily diet so that you can burn enough fat to fill the Bat Cave (I know, kinda of a gross mental picture), have enough energy to leap a building in a single bound and build resistance to the kryptonite that is disease.
Seriously though, my 15 Super Foods are a must have in your daily diet. As they appear more frequently in your diet you will notice feeling leaner and healthier than ever. I promise.
So what is a Super Food? Quite simply I am referring to foods that provide exceptional qualities and high levels of essential nutrients so that you can maximize your health and vitality.
Here are your Super Foods:

Proteins
All of the Super Proteins are a great source of protein and also healthy fats. This is the key to fat loss. Protein will allow you to maintain your metabolism maximizing lean muscle. Meanwhile the healthy fats will ensure your hormones are properly balanced so that you are burning fat and not falling into fat storage mode.
- Grass Fed Lean Red Meat – Abundant in iron, zinc, magnesium, phosphorous, b-vitamins, creatine and the antioxidant alpha lipoic acid.
- Wild Salmon – High levels of Omega 3 fatty acids (EPA & DHA), vitamin B-12, vitamin B-3, vitamin B-6, and selenium.
- Free Run Whole Eggs – Great source of choline, iron, calcium, phosphorous, potassium, vitamin A, the B vitamins, vitamin E and folic acid.
Veggies
I think you’d agree that a diet high in good quality vegetables is sure to enhance your health and vitality. These specific Super-Vegetables happen to be among the most nutrient dense and in the case of the cruciferous vegetables (broccoli, cauliflower & cabbage) the Indole-3-Carbinol in them has been linked to reduced risk of cancer. Just make sure to NEVER boil cruciferous veggies as that will destroy the potential anti-cancer benefits.
- Spinach – Great source of iron, calcium, potassium, zinc, phosphorous, selenium, magnesium, manganese, folate, folic acid, vitamin A, vitamin B-2, vitamin B-5, vitamin B-6, vitamin C, vitamin E and vitamin K. Also contains opioid peptides which play a role in brain function.
- Broccoli – High in fiber, vitamin C, beta carotene, lutein and contains Indole-3-Carbinol with potential anti-cancer benefits.
- Cauliflower – High in fiber, folate, vitamin C and contains Indole-3-Carbinol with potential anti-cancer benefits.
- Cabbage – Good source of vitamin C and glutamine for enhanced gut health. Also contains Indole-3-Carbinol with potential anti-cancer benefits.
Fruits
The Super-Fruits contain a wide variety of nutrients and phytochemicals that will help to cleanse your body of toxins, speed up fat burning, improve gut health and help to prevent disease.
- Tomatoes – Great source of vitamin C and the powerful antioxidant lycopene which provides protection for you skin and keeps your eyes healthy as you age. Lycopene also has been linked to preventing plaque deposits in arteries.
- Blueberries – High in fiber, manganese, vitamin B-6, vitamin C, vitamin K and certain antioxidant phytochemicals that have been suggested to have potential anti-cancer properties.
- Mixed Beans – High in fiber, folate and iron.
- Avocado’s – Excellent source of fiber, potassium, vitamin E, the B vitamins, vitamin K and monounsaturated fat. Monounsaturated fat has been shown in scientific research to assist with weight loss, lower triglycerides and raise good cholesterol levels.
Nuts and Oils
This category contains some of the most potent fat burning and health enhancing foods on this list. The fats contained in these Super Nuts & Oils have been shown to help you to burn more fat, improve your skin health, enhance brain health, control hunger, reduce harmful disease-causing-inflammation, improve insulin sensitivity, reduce cholesterol levels, and lower high blood pressure.
- Mixed Nuts – High in the anti-inflammatory Omega 3 fatty acids, arginine, vitamin B-2, vitamin E, magnesium, phosphorous, selenium, copper and potassium.
- Fish Oil – Deserves it’s own category for it’s abundance of the Omega 3 fatty acids EPA and DHA. Fish oil is a major contributor to reducing harmful inflammation and improving insulin sensitivity so that you can maximize your health and burn more fat to boot.
- Olive Oil – Good source of vitamin E and heart healthy monounsaturated fats. Several research studies have shown that monounsaturated fat enhances the body’s breakdown of stored fat. And this happens without calorie restriction or additional exercise. By simply replacing other fats in their diet with Olive Oil, test subjects are losing weight while also improving cholesterol and decreasing triglyceride levels.
- Coconut Oil – Another fat that could have it’s own category. Populations that eat an abundance of coconut oil are some of the healthiest on the planet. Proven benefits of coconut oil include, faster fat loss, more energy, sustained energy, improved cholesterol levels, improved skin health, improved brain health, and reductions in the very dangerous and ugly visceral fat around your mid section.
Add more Super Foods to your diet TODAY!
These 15 foods are among the best of the best. Eat them frequently and you will be rewarded with health, longevity and a lean, rock hard, super hero worthy body.
James Gaida bio:
I am a fat loss expert and certified Precision Nutrition Coach. I have spent more than 13 years coaching clients in both nutrition and fitness. In that time I have also became certified as a Specialist in Performance Nutrition and a Certified Fitness Trainer. I also own many leather bound books and yeah, I’m kind of a big deal!
My baby, 4 Day Fat Loss (4DFL) is dedicated to teaching simple techniques to rapidly burn fat, increase energy and live a healthier life. If you want to find out how to burn fat quickly and transform your body check out the 4DFL Method.
Posted in Healthy Eating by .
From Lisa Bullock
Jennifer wrote in desperation to Shawna and I looking for high intensity cardio options she could use with a very limiting knee injury. She said:
“I have little cartilage on the outer side of my left knee and bone spurs. My knee issues have flared up hugely and now am trying to heal my knee. It turns out that the squatting, lunges, burpees and anything that requires I bend my knee more than 45degrees aggravate my knee. I need other ways to find my cardio!”
First of all, injuries suck big time –if you’ve had an injury, you’ve worked this one out! Before I talk about modifications and alternatives I’ll just mention sleep, rest and nutrition as essential aids to recovery. Get this covered first.
Jennifer mentioned that the big leg movements are all out for her but only at or over 45 degrees. It’s actually really important to do partial range squats to keep some quad/thigh strength happening. This will be an essential part of any rehab, especially if surgery forms parts of the equation. The inner thigh muscles (medial quads) play a very important part in keeping the knee “tracking” or moving smoothly so we need to keep them strong.
Most clients I’ve rehabbed with knee injuries/meniscus tears/cartilage probs have all been able to do partial range wall sits because it’s isometric (held strength rather than movement). Shawna’s demonstrating a deeper wall sit, but modify this by sitting higher and let the knee dictate how deep you hold this movement. Try holding this for 30 seconds if you can or work towards that goal. Eventually you can challenge yourself to hold 3 x 60 sec holds.

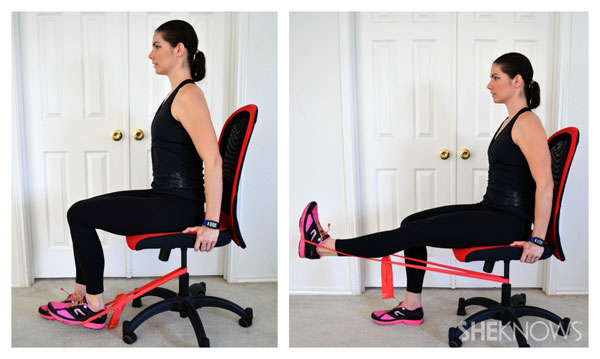
While I’m not a fan at all of leg extensions as an exercise for the general population, here’s a time when it’s appropriate to use this exercise – ensure that the weight is super light and you’re turning your toes outward slightly to engage the inner quad muscles.
But back to Jennifer’s main question – cardio fitness without burpees and running? Is it possible? You betcha!
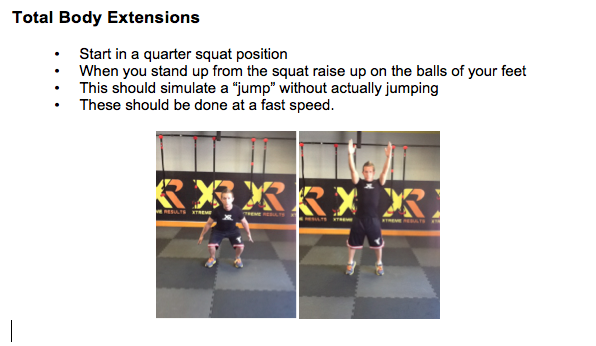
Our go-to no impact cardio exercise is the Total Body Extension. Keep feet flat on the floor, or come up onto toes but don’t add in the jump. Swing arms dynamically allowing the legs to come to a partial squat keeping your focus on fast moving arms.
My FAVOURITE weighted huffy puffy exercise without engaging big leg movements would have to be the kettlebell swing! Burpees burn 12 cals a minute – kettlebells can burn 20! It’s the perfect alternative. There’s very little knee bend but a ton of heart rate work! Get your technique tight first and then work in some kettlebell swings alongside your favourite strength moves.
Try this workout and see how your heart rate fires up:
10 Pushups
15 KB swings
10 per side KB/DB 1 leg RDL’s
15 KB swings
10 per side fast bench tap downs (below)
15 KB swings
10 per side DB renegade rows
15 KB swings
10 per side Get Ups
Repeat for a total of 4 rounds
And dear to my heart of all training – is boxing! And give me time, I’ll do a video of some techniques you can use safely. As a strong cardio workout, there’s not much beats boxing for sheer fitness. If you can get your hands on a boxing bag and gloves and just do basic punches fast and hard, your heart rate will go through the roof. If you’re having ongoing issues with your knee then this will be a worthwhile investment and SO much fun!

It’s really important to maintain quad strength through an injury like this so I always include a bench “tap down” drill too – you’ll need to test this exercise on a low step first to check that you’re not overloading the knee. Keep the step low so there’s not too much bend in the knee but you’ll still work the front of the thigh. Try 3 sets of 10/per side to start with. But “test” the movement first to check it’s OK for you.
Bench Tap Downs
- Stand on a step or low bench and step down lightly with one foot, just “tapping” the toes to the floor quickly. Step back up to tap foot to bench and repeat movement.
- Complete all reps on one side before swapping legs.
- Your legs should be slightly bent at the knee on the supporting leg, working the thigh muscles.
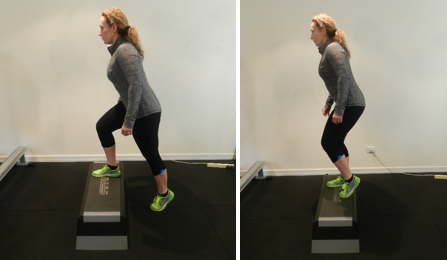
Start slowly and work up to speed. Strength is your first priority and after that, you go can for speed and heart rate. Just make sure the knee points foward in the direction of your toes and doesn’t “collapse” in. This picture explains exactly why we want to keep the quads strong!
So there you have it, some exercises to keep your quads strong despite limited movement and some ideas for keeping fitness high and calories burning while you work around the existing knee injury.
If you need some additional help with knee injuries, Rick Kaselj is THE man to go to for help. You can check out his program at Fix my Knee Pain.
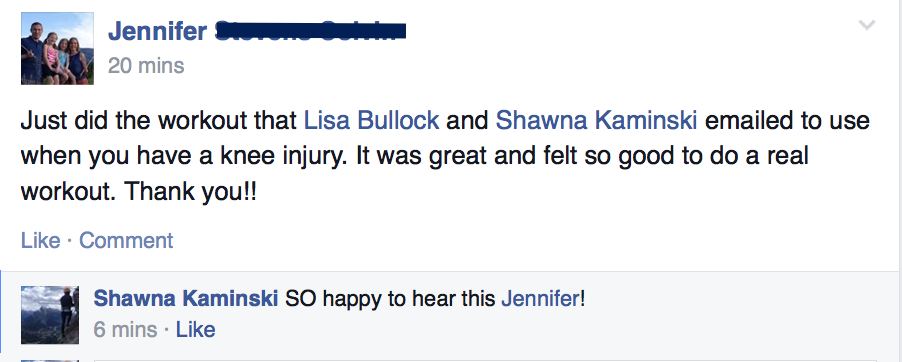
 PS. After this post, Jennifer made the comment below on our Inner Circle Facebook page. If this solution worked for Jennifer, it will work for you too! Don’t let knee pain slow you down. Use our workouts and Rick’s solution and your knee issues won’t completely sideline you anymore!
Posted in Workouts by .
This recipe takes the concept of chicken salad to a whole new level. There is so much going on in the flavor department like sweet mango, savory chicken, tender asparagus, tangy arugula, and creamy goat cheese.
Servings: 4

Here’s what you need….
For the Herb marinade:
- Juice from 1 lemon
- 1 teaspoon olive oil
- 1 teaspoon salt
- 1 teaspoon dried basil
- 1 teaspoon crushed rosemary
- 1/2 teaspoon garlic powder
- 1/2 teaspoon sweet paprika
- 1/2 teaspoon black pepper
- 1/2 teaspoon dried thyme
- 1/4 teaspoon celery seeds
- 1/4 teaspoon dried parsley
- 1/8 teaspoon ground cumin
For the Salad:
- 1 lb skinless, boneless, thin chicken breasts
- 1 bunch asparagus, ends trimmed and cut into 1 inch pieces
- 8 cups organic arugula
- 2 small organic mangoes, peeled and sliced
- 6 oz crumbled goat cheese
- Combine the herb marinade ingredients in a small bowl. Place 1 Tablespoon of the marinade in a large Ziploc bag with the asparagus pieces, and the rest in another large Ziploc bag with the chicken breasts. Make sure the chicken and asparagus are fully coated with the marinade, and then place in the refrigerator for an hour.
- Heat a grill pan and another medium pan. Place the chicken breasts on the grill pan, and cook 4 minutes each side, until there is no longer any pink in the middle. Sauté the asparagus in the medium pan, stirring often while the chicken cooks. Remove both pans from heat.
- Once the chicken has cooled, slice each breast into even strips.
- In a large bowl combine the arugula, mango slices and crumbled goat cheese. Add the cooked asparagus and the chicken. Mix and serve.
Nutritional Analysis: One serving equals: 332 calories, 13g fat, 740mg sodium, 16g carbohydrate, 4g fiber, and 34g protein
Posted in Healthy Eating by .
19
Jun 14
Easy Pork Chops
Lean cuts of pork are high in protein and low in fat. Add a side of veggies and you’ve got a clean meal that delivers all the right nutrients without waist-expanding carbs.
Servings: 4

Here’s what you need…
- 2 apples, chopped
- 1 medium yellow onion, chopped
- 2 Tablespoons coconut oil
- cinnamon
- sea salt
- 4 lean pork chops
- 1/4 cup white wine
- 1/4 cup sliced almonds
- In a large skillet warm 1 Tablespoon of the coconut oil over medium heat. Add the apples and onions. Sauté for 5 minutes until the apples are tender.
- Remove the apples and onions from the pan.
- Add the remaining Tablespoon of coconut oil to the pan and leave the heat on medium. Sprinkle cinnamon and salt on both sides of the pork chops then rub in.
- Place the pork chops in the pan, sear on each side for 2 minutes.
- Add the wine and bring to a boil. Add the apples and onions back to the pan, cover and cook for about 6 minutes.
- Sprinkle with the almonds and serve the chops with a generous helping of the apples and onions.
Nutritional Analysis: One serving equals: 296 calories, 12g fat, 94mg sodium, 10g carbohydrate, 2g fiber, and 21g protein
Posted in Healthy Eating by .
13
Jun 14
Pilates Waist Slimming Workout
Guest Post: Sylvia Favela
If there’s one really noticeable, common element to all of those women who practise Pilates – it would be their sleek, sexy physique. Just look at today’s top celebrities and you’ll be sure to find that their weekly routine includes Pilates!
When practising Pilates you need to keep in mind that it’s quality NOT quantity that makes the difference. When you execute these moves with control and awareness you’ll quickly notice a tighter mid-section!
Let’s face it, no-one wants a flabby waistline! Sexy curves and a trim waistline are just some of the benefits you’ll get with Pilates. When you slip on your bikini this summer, is it the muffin-top you’ll be seeing or a sleek waistline?
Pilates Waist Slimming Workout:
Do 10 reps of each move (left and right equals one rep) for a total of 4 sets. Do both exercises in a row without stopping. Only take a rest if you need it – add 10 seconds rest between sets.
Chest Lift x 10
Single Leg Switch x 10 per side
Up to 4 sets
- Keep your abdominals drawn in and tight. Keep your belly button pulled into your spine – we are targeting the deep transverse abdominals that wrap around your hips like a cumberbund or corset of muscle. We want to keep those muscles engaged throughout the workout.
- Resist the urge to arch your lower back or use your hip flexors. Keep your spine in neutral.
- Keep your pelvis still by trying not to rock your hips side to side.
- Let your head fall gently back into your hands with no tension in your neck.
- Maintain proper head alignment with the spine.
- Keep ribs pulled in towards the spine and down to the floor.
- Do not tuck your chin to your chest or shrug shoulders up to your ears.
- Breathe! Inhale and exhale through each move.
Pilates is a unique method of engaging your abdominals without the overuse of your lower back or stress on your joints. It’s time efficient, doesn’t require equipment and can be done anywhere. Combine these moves with your great nutrition and you’ll be sporting your sexy trim waistline too.
For more fun and effective Pilates workouts check out Sylvia “The Pilates Chick” She’s celebrating her 40th birthday in fabulous shape – so check out the birthday savings YOU can enjoy!
Posted in Workouts by .
12
Jun 14
On-The-Go Ham Cups
Here’s a recipe for the perfect on-the-go energy food. Ham, broccoli and an egg combine for a tasty snack that’s packed with protein and fiber. Make a dozen and enjoy throughout your week.
Servings: 12

Here’s what you need…
- 1 teaspoon olive oil
- 1 clove garlic, minced
- 1/2 yellow onion, chopped
- 12 slices of nitrate free ham
- 1 cup broccoli, steamed and chopped
- 1/4 cup shredded cheddar cheese
- dash of salt and pepper
- 12 eggs
- Preheat oven to 350 degrees F. Lightly spray a muffin pan with nonstick cooking spray. Set aside
- In a medium sized skillet, heat the olive oil over medium heat. Add the garlic and onions. Cook until tender.
- Add the steamed broccoli, cheese, salt and pepper. Mix until fully combined. Remove from heat.
- Using kitchen scissors, make a slice to the center of each piece of ham, then fold into a cone shape in each muffin cup. Fill halfway with the broccoli mixture.
- Crack an egg into each ham cup. Bake for 16-20 minutes, or until the edges of the ham are crispy.
Nutritional Analysis: One serving equals: 135 calories, 8g fat, 437mg sodium, 2g carbohydrate, 1g fiber, and 12g protein.
Posted in Healthy Eating by .
-
-

Let Me Help You
 My passion is teaching people how to work fitness into their daily lifestyle in order to improve their quality of life. Let’s work together to help you reach your fitness goals!
~Shawna Kaminski
Recent Posts
